How to Install WordPress: a Guide for Beginners
I won't lie to you: WordPress installations seemed quite scary to me only a few years ago. Fortunately, I have gotten over this, and now I can write guides which show others how easy it is to install the world's most popular content management system. Let's get started!
If you aren't a computer geek, WordPress can feel intimidating at first. People who are familiar with database creation and PHP file edits can customize the installation to their liking by following a more advanced tutorial - this one, for example.
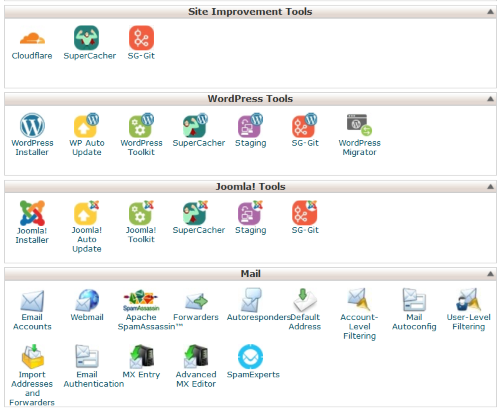
However, if you are a beginner and your site will be hosted using one of the popular providers, such as Siteground or Hostgator, you can utilize their user-friendly cPanel to install WordPress by making use of a nice graphical user interface. To do that, log into your hosting account, access cPanel, and then navigate to the "WordPress Tools" section. The "WordPress Installer" option is almost always the first on the list; see for yourself!
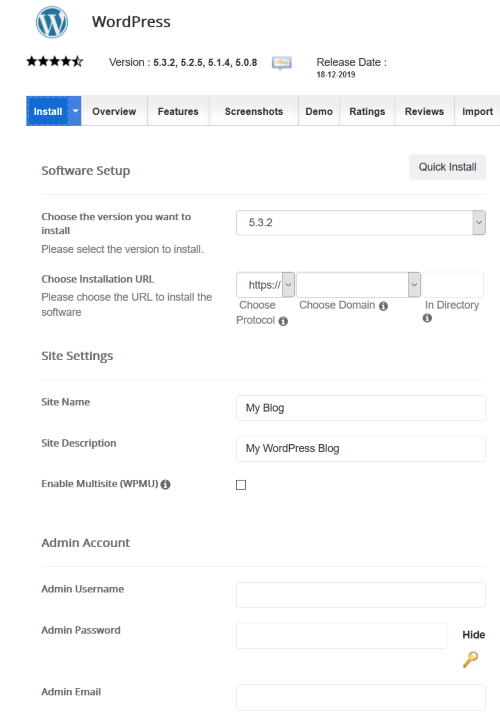
Click the WordPress Installer button, and you will be sent to a page that looks like the one below.
Don't worry, we will go through all the fields, one at a time. First of all, choose the installation URL (that would be your domain name), and then fill in the "Site Name" and "Site Description" fields. If your future online store will be named "Fresh Roses", that's what you are supposed to use for the "Site Name", get it? The description of your website will often serve as a tagline, so you could use something along the lines of "Shop Flowers Online" for it.
It's time to fill in the "Admin Account" fields. Pick a random admin username; don't choose "admin", because it's the first option targeted by hackers. Instead, go for something like x4i2hQ and I guarantee that you'll be ahead of the pack. The longer the username, the better, of course.
The password should have at least 15 characters; it is crucial to use a combination of uppercase and lowercase letters, numbers and special symbols. Don't forget to write down the username and password; you are going to need them anytime you want to access the WordPress dashboard.
Finally, type in your email address in the "Admin Email" field; this way, you will be able to receive all the messages that are sent from your website's contact form straight into your inbox.
Once that you are done with this, click the "Quick Install" button in the upper right corner, and then wait for a few seconds. If everything worked as expected, WordPress will be installed, and you'll be able to log into the admin panel using the previously defined username and password. To log in, visit this URL:
https://yoursite.com/wp-admin
Don't forget to replace yoursite.com with the name of your website. Then, once that you have logged into the dashboard, you can start to customize the site, creating the needed pages, adding blog posts, and so on. There are many WordPress customization tutorials on the web; just run a Google search and I guarantee that you will find plenty of them.